vCenter Server 6.7 Installation and Configuration
vCenter Appliance (vCSA) Deployment
vCSA is a virtual machine and can be deployed on ESXi hosts running version 5.5 or later. Depending on size of the vSphere deployment and whether you plan to install vCenter appliance into existing environment or starting new one, you have an option to install vCSA with embedded or external Platform Services Controller. This article provides information about how these components work together (link).
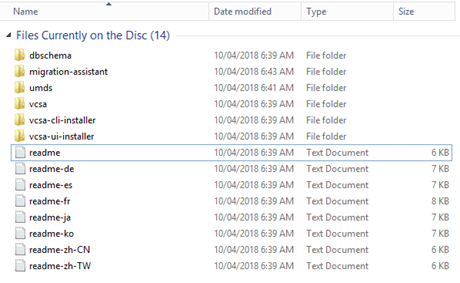
Let’s start with a simple option of deploying vCenter with embedded PSC. vCSA distribution media is ISO file named in the following format: VMware-VCSA-all-<version>-<build-number>.iso. To start installation mount this file on a workstation running Windows, Linux or MAC OS. The root of the folder contains readme.txt file explaining different installation options.
vCSA can be deployed using GUI or CLI. As shown in Figure 1, each installation option has dedicated folder. vcsa-cli-installer folder contains files for CLI-based setup and vcsa-ui-installer for GUI-based setup.
Inside vcsa-ui-installer folder there are 3 subfolders – one for each of the supported OS versions. The example uses Windows-based installation which is started by launching installer.exe.
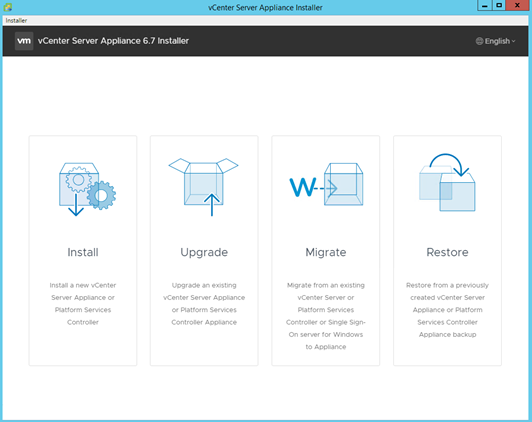
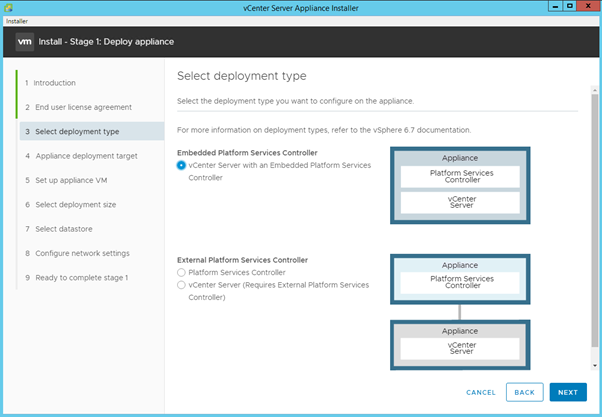
To deploy new vCenter Appliance click on Install button. The wizard will guide you through the installation. First 2 steps are introduction and license agreement. Step 3 requires selection of the deployment type: either Embedded or External PSC. In this example, Embedded PSC option is selected.
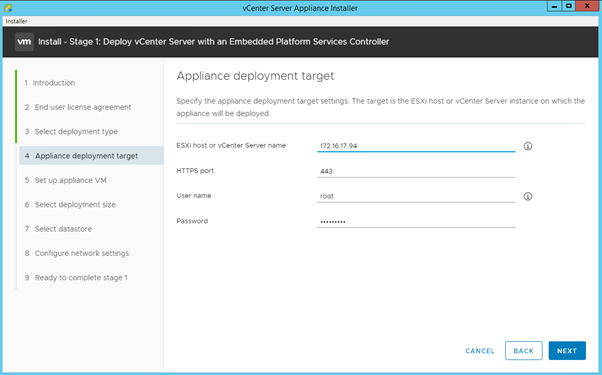
Then provide details of ESXi host or vCenter Server instance for appliance deployment.
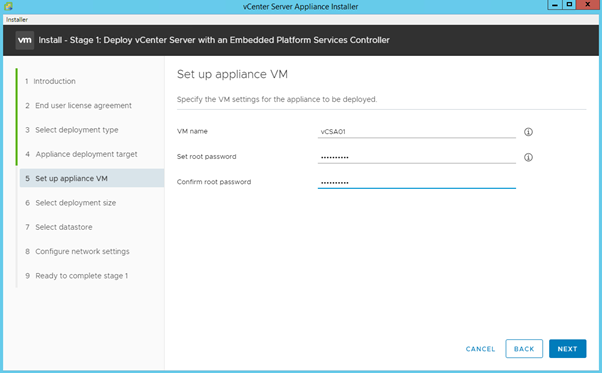
After connectivity to the target ESXi host is performed, the wizard prompts for appliance VM name and root password.
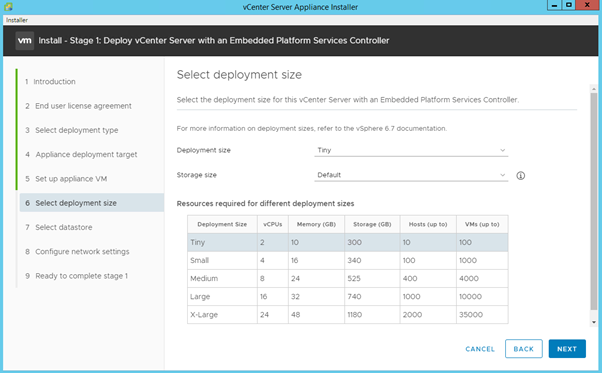
To allocate hardware resource for the appliance, installer asks for the deployment size which is based on number of managed hosts and virtual machines. Storage size for vCenter includes requirements for historical logging data and Update Manager. Storage requirements just for PSC is 60 GB.
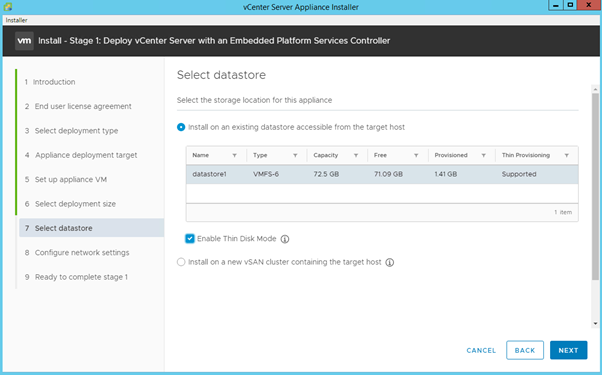
During step 7 select datastore for the appliance’s virtual disk.
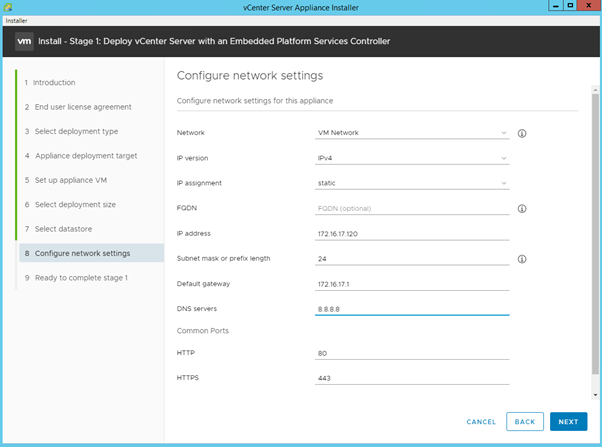
Fill-in network settings, including IP and DNS settings.
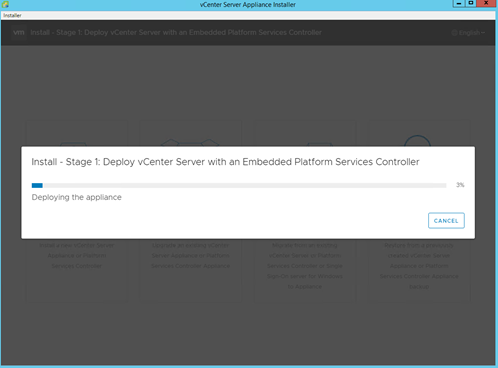
At the final step review settings and start the appliance deployment.
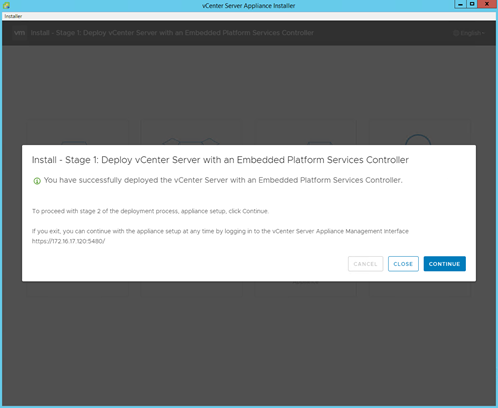
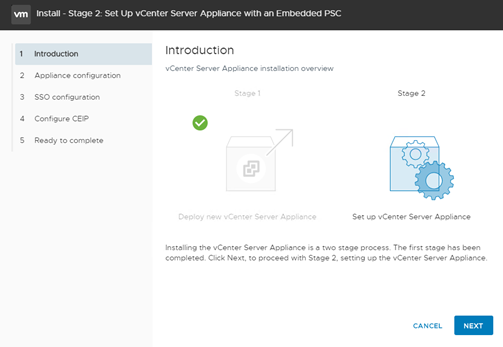
After the deployment is completed you are prompted to start configuration stage. Press Continue to start second stage of the process.
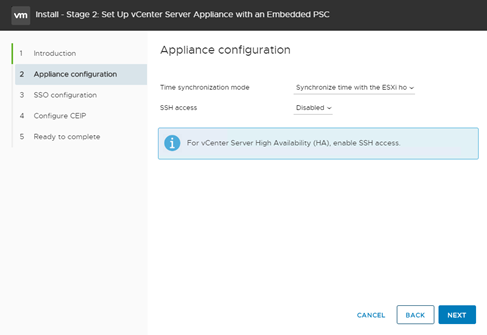
Appliance configuration step provides options to configure time synchronization with ESXi host or NTP server. By default, SSH access to vCSA is disabled and you can enable it at this step.
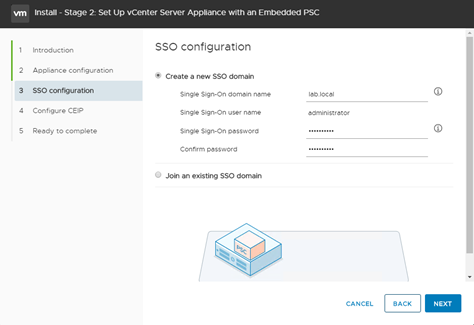
For this simplified deployment, new SSO domain called lab.local is created and administrator’s password set.
The next step offers to join Customer Experience Improvement Program and final step provides overview of selected options.
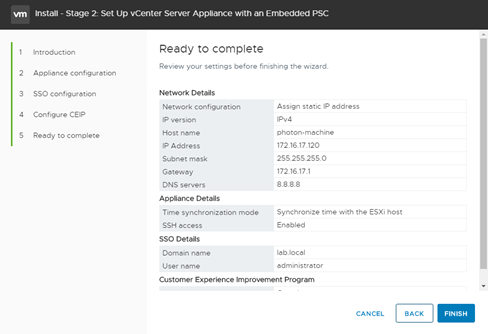
Press Finish to finalize Stage 2 of deployment.
Post-Installation Tasks
Once vCSA is deployed you can view and modify appliance settings by opening the following URL: https://<vCSA-IP-address-or-name>:5480
This GUI can be used only to manage appliance settings, to perform VM-related management settings see the section below called vSphere Client / vSphere Web Client.
As shown in the logon prompt below appliance root credentials (not SSO) should be used.
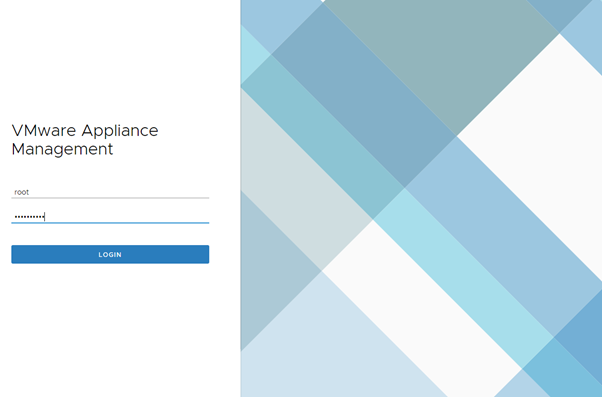
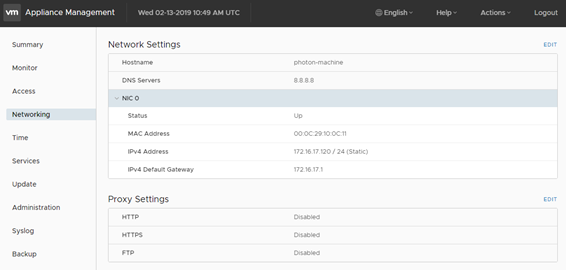
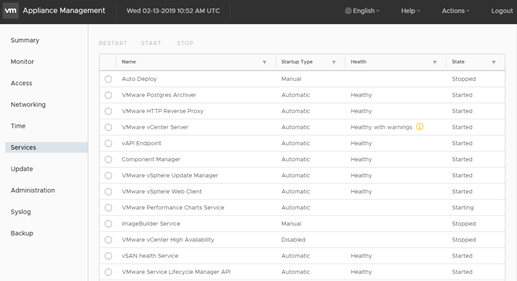
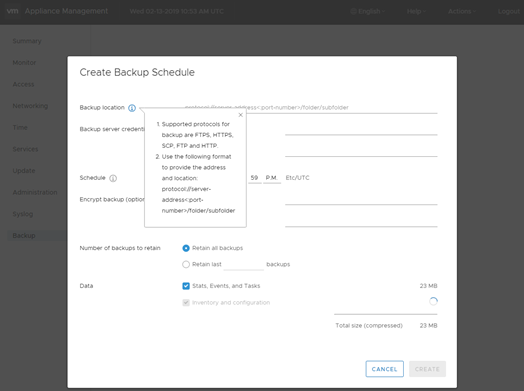
Once logged-in you can perform appliance-level tasks including configuring network parameters, time settings, backups, system service management and utilization monitoring.
The next figures show screenshots of configuration windows, such as networking, service management and backup.
vCenter Server Installation
vCenter Server can be installed on Windows 2008 SP2 and later. 64-bit version of OS is required. The following few paragraphs show how the installation is performed.
Download installation ISO from VMware website. It’s name will be in VMware-VIM-all-<version>-<build>.iso format. Mount it on the Windows VM or physical server that will be running vCenter Server.
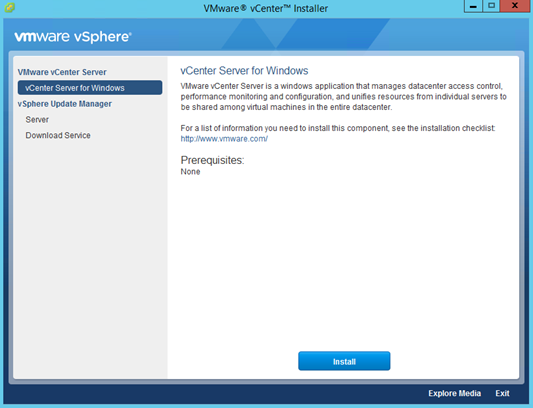
Run autorun.exe from the root of the DVD. Welcome window will have options available for vCenter Server and vSphere Update Manager installation as demonstrated in Figure 19. Press Install button.
At this stage the installer will check for software pre-requisites. I perform installation on Windows Server 2016 Standard Edition and no prerequisites were identified by the installer.
After welcome and license agreement pages, you will be prompted to choose type of the deployment.
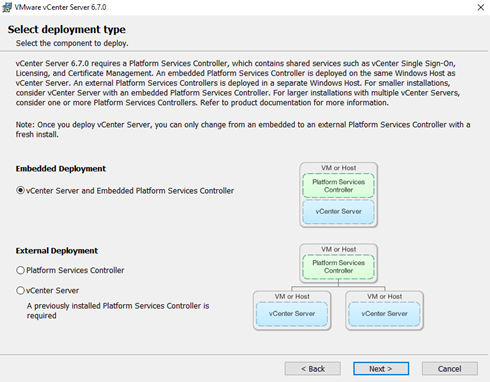
For this example, embedded deployment options is selected. Next step prompts to enter system name in FQDN format, or IP address if DNS is not available. Note that the system name cannot be changed after the installation.
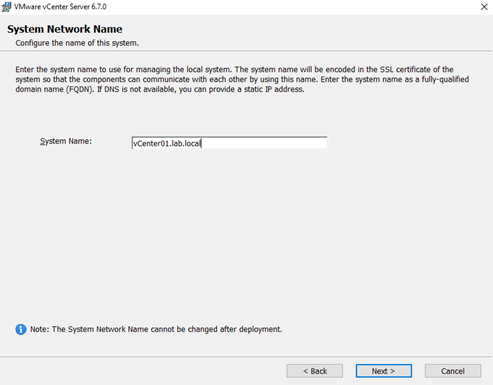
After pressing Next, the setup process will query DNS to ensure that it can resolve the name and will not proceed further if it cannot be resolved. You can use hosts file for the lab environment, however, there will be a warning message saying that the name cannot be found in DNS, but you will still be able to proceed with the installation wizard.
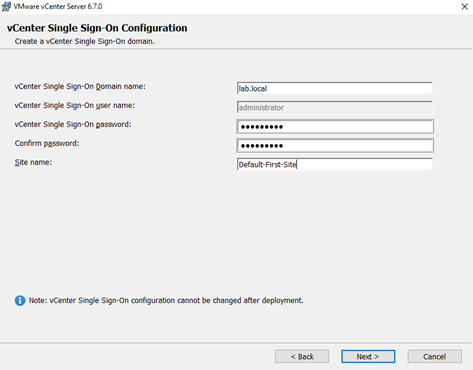
The next page asks for vCenter Single Sign-On Parameters, such as SSO domain name and site name.
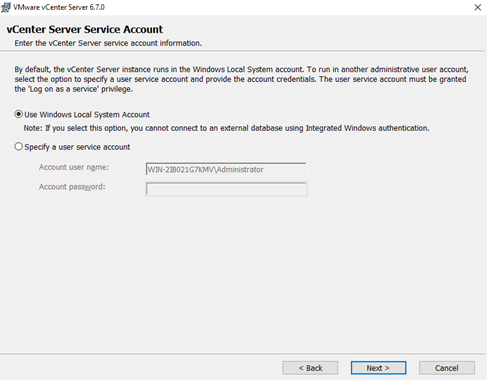
The next window provides an option to select a system account that vCenter process will be using. Windows Local System Account was selected, however, it cannot be used to authenticate with external database servers using Windows Integrated Authentication. In production environment with external database server you should consider using dedicated account for this purpose.
If dedicated account is used, ensure that “Log on as a service” right is assigned to it and create a separate service account with appropriate level of access and password policy. For example, service accounts might have different requirements for password age and complexity than normal user accounts.
The next page prompts for database settings. See the section “Selecting vCenter Database Options” below for scaling limits and why you most likely will want to use an external database. We will use embedded database (Postgres) for this example.

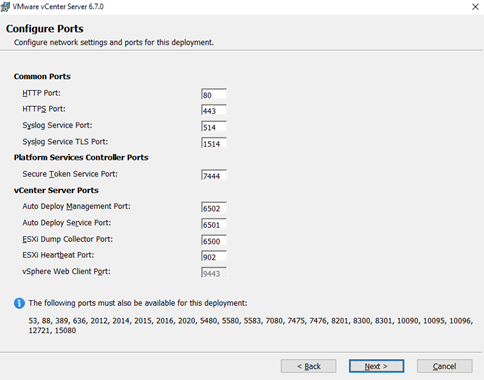
Press Next and Installation Wizard allows to change ports on which vCenter will be listening. Unless the server runs some other applications, there should be no need to change any of the default allocated ports.
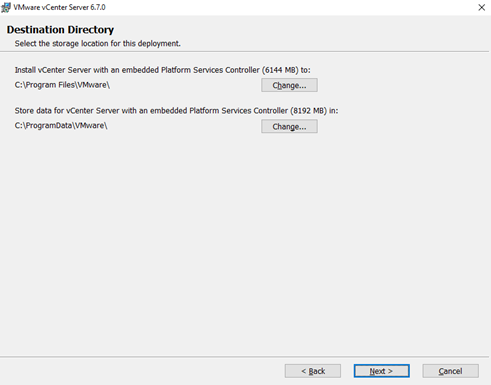
Review configuration options and finalize the installation.
Selecting vCenter Database Options
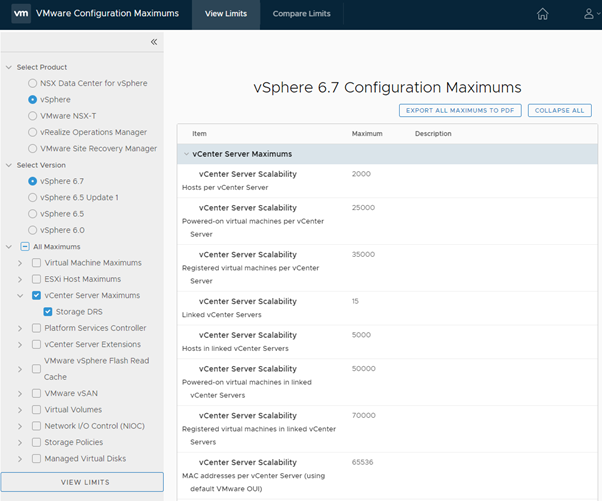
vCenter Server Appliance (vCSA) doesn’t support external databases starting with version 6.5 and must use bundled PostgreSQL database which supports up to 2000 hosts and 25000 powered-on virtual machines in version 6.7.
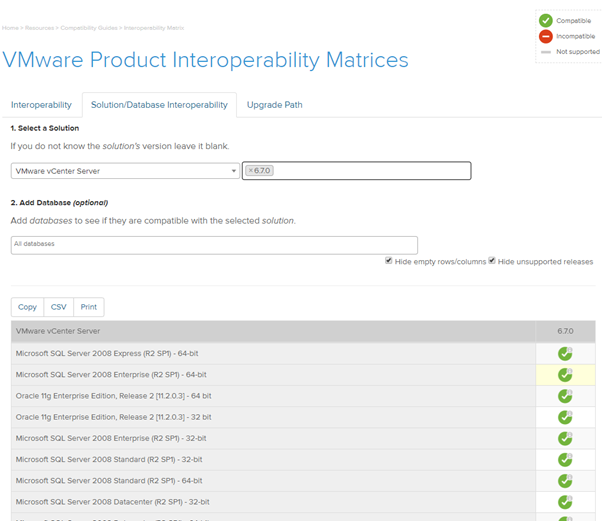
vCenter Server can also be installed with bundled PostgreSQL database. However, this option is limited and suitable only for small environments. vCenter server 6.7 with internal database can only support 20 hosts with 200 VMs. External databases are supported for better scaling, the options are Oracle or Microsoft SQL Server products. To find the supported versions of databases navigate to this link and select VMware vCenter Server as solution with desired version.
vCenter Server 6.7 with external database has the same configuration maximums as vCSA with embedded database.
To use an external database, an administrator must pre-configure it either manually or by letting installer configure it automatically during the installation process. vCenter server installation guide includes detailed instructions on preparing the database servers and required permissions for vCenter account.
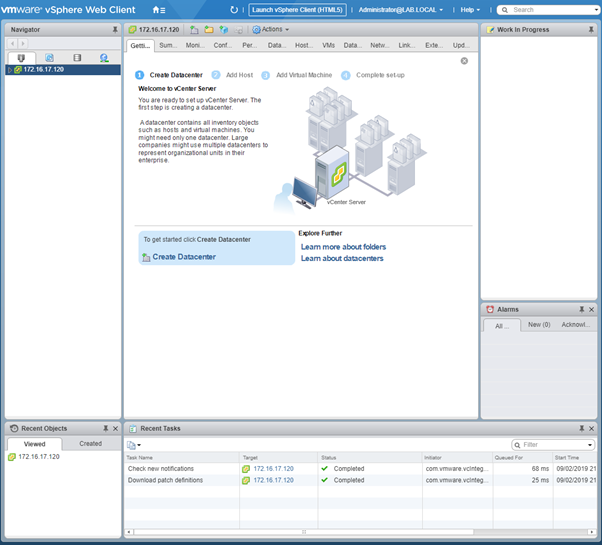
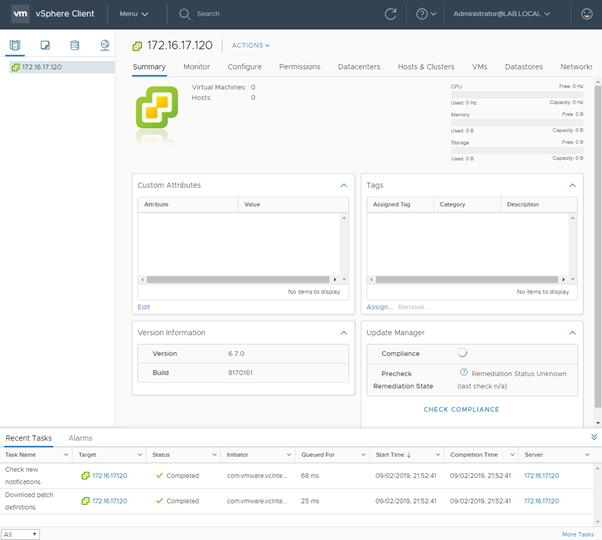
vSphere Client / vSphere Web Client
Starting with version 6.5 vSphere Client (HTML5) and vSphere Web Client (FLEX) are installed automatically with vCenter Server. URLs for each options are:
vSphere Client: https://<vCenter>/ui
vSphere Web Client: https://<vCenter>/vsphere-client
Flash-based vSphere Web Client will be retired soon and HTML5 vSphere Client will be the main GUI for managing vCenter. In version 6.7 you can still use both as shown in the next figures.